")
Spinning pizza dough in the air is not always just for show in contrast to what many people think. It also has a primary purpose to spread the dough properly, without necessarily pushing your fingers through it.
It’s a ‘job well done’ if you could pull off a homemade pizza with no more single slice to grab on the platter. In making pizza from the scratch, making the dough is a key component that needed right technique and practice.
Just like a food made from the heart, it must be prepared deliciously from the inside out. Don’t be tamed because you are meant to be great as a pizzaiolo!
Go through the art of tossing, spinning and stretching pizza dough to engage with your patron who can’t wait to taste your masterpiece.
Don’t think twice to finish this page cause we deliver the best piece of advice on how to get the most of your pizza dough tossing!
How to Spin Pizza Dough – Best Piece of Advice
“Take off your jewelry or watches” a side note by Tony Gemignani an eight-time winner of the world championship in pizza-dough acrobatics and owner of 16 pizzerias in California and Las Vegas. Further, your hands should be bare, with fingernails cut short to avoid snags.

Step 1: Do your Dough
Choose the right flour and learn the right approach to develop the gluten that will give your dough a stringy and chewy texture.
To develop the ideal pizza dough, knead and rest it two times and proof it after. Make sure to follow your recipe accordingly. In case where the recipe instruction requires you to knead for seven minutes, you should set your timer and knead not less than but rather more than seven minutes.
Once you’ve nailed a classic dough recipe, it needed to rest in a room temperature. However, if you’re using frozen dough, plop it in an oiled mixing bowl and let it loosen for 30 minutes. The resting period is necessary to let the yeast on work. It will double the size of the dough like the usual point in baking bread and cookies. This process is vital to shape it properly.
Click here to know the 6 proven ways of defrosting a pizza dough
Step 2: Ready your stretching station
When the dough is ready, work space is the next element to work on. Better prepare the following materials first to start it smooth.
- flat plate
- mixing bowl/flat plate
- a cup of flour
- a pizza peel or a cutting board
Instructions:
1. Cut your dough into portions base on how many pizzas you intended to cook.
2. Create these dough into balls like the size of soft ball or at least 12 to 14 ounces. Coat each of the dough with good amount of flour.
3. Transfer the dough onto your pizza peel sprinkled with flour. This will prevent the dough from sticking. However, it is also advisable to rub the surface with a drop of olive oil for the same purpose but it’ll give crispy and golden crust as an advantage.
Step 3: Slap the dough
There is no rule in baking pizza but there are proper ways to execute the process of making the base. To form the dough into desired shape, slapping it will do. For some, they slap the dough and will toss it upward and some will just slap and toss it in the kneading place. Get a good grab of one side of the dough. Slowly lift it and slide it downward and cover the remaining edge over it. You must press it with your flat palm or forearm to prevent the dough from breaking. Also drape it back and forth from time to time. This crucial rotation will stretch the dough nicely.
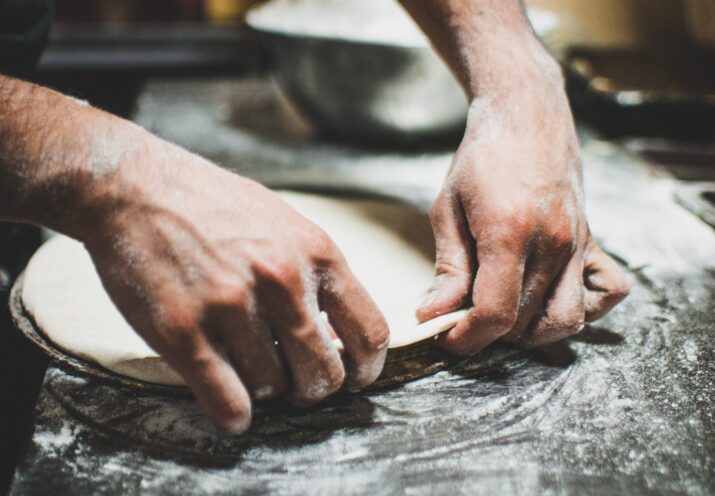
Step 3: Finger pressing
Flatten the dough into a disc using this technique. Gently press the dough using your hands and move it away from each other to stretch the base outwards. Shape it into circle as much as possible to achieve the desired base shape you wanted your pizza to have.
Pro tip: If you notice that the dough is stiff and buffing, let it rest for extra 15-20 minutes. It is normal if the base is shrinking a little bit. But if it shrinks a lot, let it rest till it gets firm with the shape.
Step 4: Dough Tossing
Why is Spinning Pizza Dough important?
Spinning pizza dough in the air is not always just for show in contrast to what many people think. It also has a primary purpose to spread the dough properly, without necessarily for your fingers to push through it.
Dough tossing helps to retain the moisture of the dough unlike when using pizza makers. If you observe, these devices tends to make the crust dry and harder to work with because it uses a dough sheeting to flatten out.
It is difficult to spread dough only with your bare hands. Uniform crust is also an advantage that you could get when you spin the dough disc high in the air.
Step 5: Dj deck Stretching
Still use your hand to stretch the pizza. The next thing you will do is the rotation or the Dj deck technique. Pick up the circled dough. Let it hang under your two hands positioned in the edge. Carefully rotate it in one direction while your hands is pulling it outwards. It will make the base wider, flattening out lumps to get a more even and smoother base. Reach a size of 11 inches in diameter and 1/3 inch thick. Don’t be bothered if you see little spots or holes, because it will be fixed by doing the next step.
Step 6: Steering wheel stretching
Another technique in stretching is the ‘Steering Wheel’. This will get the pizza base even bigger and thinner with gravity involved. Pick up the pizza base and let it hang down like a curtain. Rotate the base around and pinch sideways the edge of the dough. If the dough is prepared right and get enough time to rest, it will surprisingly get strong structure so don’t be scared to pick it up. As options, you can also pinch right from the edge of the dough or handle a wider part of the base closer to the center of the dough. This process will give you more control on how high the crust will go after it cooks up in the oven.
Check your dough from time to time until it is evenly stretched. To see if it is already well done, hold the base and stretch it up to the light to check how translucent it is. Thin base is preferable for a Neapolitan-style pizza. To see if it is quite thin, you should be able to see a lot of light through it when stretched.
Step 7: Stretch dough on the pizza peel
When the stretching process is done, move the dough carefully onto your pizza peel or sheet pan. If it accommodates about 10 inches across, let me give you a good pat on your back because you’re becoming a real pizza professional! However, if there still noticeable imperfections, you might still need to get a grasp and continue learning with this article.
Fixing pizza base is also as fun as sealing a hole or a rough space with a cement. To do so, simply closed the torn areas by pinching or press around until the hole or spot is not visible on its surface. You might still run on some uneven areas. Don’t miss to fix it with a light press until they reach about 1/3 in thickness. Worry less when the edge doesn’t look thicker than the center. The toppings will likely to weigh it down and the crust will level and puff up when it is cooked at the oven.

Photo: Gettyimages.com
Final Thoughts
If you are new in this craft, stretching pizza dough may quite intimidating at first. But if you join us up to this part, let us cheer together cause we will surely ace this task!
To get good thickness and evenness of your pizza, learn ways on how to roll and spin it properly. To sum up your way to success:
- Begin with sanitizing yourself and your work space is all set.
- Get a good flour for pizza and prepare it according to recipe instructions.
- Then stretch out the dough in several ways and shape it into a traditional round pizza.
- Make sure to throw the pizza dough on air with the most comfortable hand you use for this kind of task.
- Lastly, assemble it in pizza peel. Fix the imperfection and finish it with a light press of your fingers all over except for the edge.
Take a note that you can’t be a pro in an instant. You must try performing stretching techniques and recipes for many time until you get it right.
These compilations of tips and tricks were proven and tested over times in making the crowds favorite pizzas in town.
Bag this information and accompany it with video tutorials that you can easily find in Youtube. What are you waiting for? We don’t need that rolling pin, just our diligent hands to do the tossing!
Click here to read about the Best Pizza Peels
Like this Article? Subscribe to Our Feed!
Author: Vanessa Richards
Vanessa is a mom of 3 lovely children and she enjoys all things related to culinary and gardening.